I love hearing from you!

If you ask a question in your comment, please make sure to either show your email in your blogger profile, or email me directly....this is the only way that I can answer you!
Showing posts with label Digi Releases 2012. Show all posts

Tuesday, January 8, 2013

LATCH WRAP BOX

Good Tuesday Tutorial Morning to you. Lisa here.  Happy New Year.
Today I will show you how to make this
LATCH WRAP BOX
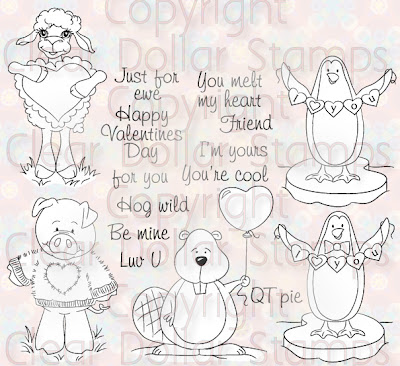
Using the adorable digis designed by Laurie Wilson
(for the color image)

(for the sentiment)


Start with your piece of cardstock 8 5/8 x 2 3/8 +1/16 I printed digi paper from the digi LOVING CRITTERS COLOR  onto white cardstock. 

Now Score and fold from left to right on the long side at 1 3/4, 2 1/2+1/16, 6 1/16, 6 7/8, 8 5/8

Place 2 glue dots on the bottom of the box and two on the top of the box (these will adhere but can also be pulled up without leaving much damage to the wrap) then wrap the paper wrap all around to the front. 

Now we are ready to make our latch. 

I printed out my image (I made sure it would fit in my 1 1/2" circle.......as you can see I cut out just part of it to fill the circle and see it better).  I then cut it out using the second from the smallest circle die in the Spellbinders large circles (not grands).  I then embossed it on the cuttlebug too!

To Make the Outter ring.......I just used the 3rd scallop circle from the smallest and the 2nd circle nestability from the smallest (spellbinders dies) put them inside each other and ran them through my cuttlebug then embosssed just the circle in the center. 

After cutting out your ring...flip it over and place dimensional tape pieces only on the top half!

Center the ring on the front and adhere. The dimensional tape should only be on the top half so it will open.

Take your small circle, flip over and place dimensional tape only on the bottom of the circle.

FRONT

LATCH OPENING

INSIDE
This is a Valentine Latch Wrap Box but you can do this technique with any small box for any occasion. 

Tuesday, December 18, 2012

Using Java Minute Digi

Hi, Lisa here. This is just a mini tutorial today. I just wanted to show you ways to use one of my most recent digis
I made this digi to be versatile.  So you could do more with it.  So today I'll show you a few things this digi can do.........of course your imagination is the limit.


Overlay on silhouettes
There is an outline clear overlay in this set. You can place it directly over the silhouette or off to the side a little or a lot.  I just arranged the order to make my overlay in front of the silhouette.

Silhouette/Sentiment
You can put the sentiment over the silhouette in black or a darker tone of the silhouette.


Layering
You can layer like I did here...I used a color image, sentiment and border (twice). I just arranged the order on each image to place it in front or behind.
I made this set of cards using the clear outline overlay and the silhouette images.
Here's a closer look.
Here is the inside.

 Here's some Design Team samples using this set.
Sarah Taylor made this shape gift card holder. I love her paper piecing.

 
She tucked the gift card on the inside.

 Cassie Trask worked her magic with an outline image in this beauty.

Lori Ulrich used the border brilliantly here and I love the black silhouette shadow behind her color image.
I hope this tutorial inspired you and shed some light on the many ways this set can be used.


Saturday, December 15, 2012

December Digi Day at CDS!


 Hello Everyone!

It is Digi Day at Clearly Digi Stamps today!  You are going to love what the girls have come up with, so let's get started!
.....................................................................
But first.......
Are you new to digis?
Well, if you are, here is a quick explanation.  You will buy and download a "zipped up" file.  You will unzip this file and receive all the images in jpg and png formats.  You will then pull those into a Word doc or picture editor and print, print, print.
Here is a little tutorial and FREE digi that will help you along!

 ...................................

 Digis by Lisa Lara


This set is sure to get your creative juices brewin!
Lisa has designed this set in a rainbow of colors with matching papers, something that will definitely get my creative juices flowing!  I am one of those people who shop by color, so I find this set to be really tasty!

Java Minute Digital Image

Designed by Lisa Lara. Copyright Lisa's Doodley Doos. Licensed by CDS.


The DT members who created previews with this digi:

 ...................................

PENGUINS!!!!!!!!!!!
This adorable little set is perfect for birthdays, anniversaries, Valentine's Day, and just a card to say hello!  I personally love penguins, so I may have to have a little desk notepad made with these little guys!

Pal Penguins Digital Image

Designed by Lisa Lara. Copyright Lisa's Doodley Doos. Licensed by Clear Dollar Stamps.


The DT members who created previews with this digi:

 ...................................

Digis by Laurie Wilson

 Everyone needs birthday cards, birthday calendars, birthday gift wrap, birthday gift bags....so this is the set for everyone!  Complete with FOUR papers for you to print and create with, you are going to have fun with this set!

Birthday Bash Digital Image

Designed by Laurie Wilson. Copyright Clear Dollar Stamps.

 Go to Birthday Bash Digital Image


The DT members who created previews with this digi:

 ...................................


This set is perfect for young and old alike!
Covering birthdays to baby showers, this is a must have for your collection!

Cute Critters Digital Image

Designed by Laurie Wilson.  Copyright Clear Dollar Stamps.


The DT members who created previews with this digi:
 ...................................

These little angels are just heavenly to work with!  Ornaments, baby rooms, and so much more!

Patchpal Angel Digital Image

Colorized by Laurie Wilson.  Illustrated by past CDS illustrator.  Copyright Clear Dollar Stamps.


The DT members who created previews with this digi:
 ...................................

Digis by Austin Owens

Austin has been doodling up a storm this month!
My favorite has to be the bride and groom dogs!  We just got a little boy Sheltie to marry our girl Sheltie....so I can see this coming in a scrapbook page!

Animal Mania Digital Image

Designed by Austin Owens. Copyright Austie Bost Stamps. Licensed by CDS.


The DT members who created previews with this digi:

 ...................................

Now I know there are a number of you out there that have princesses that need scraped! 
I know that princess rooms need decorated!
I know that princesses need birthday cards!
So you are all set with Austin's adorable little princess set!

Princesses Digital Image

Designed by Austin Owens. Copyright Austie Bost Stamps. Licensed by CDS.


The DT members who created previews with this digi:

 ...................................

Flowers, flowers, flowers!
Perfect for journals, cards, notepads, and....
what about jewelry!  Grab some of those little glass pendants, insert one of our printed digi flowers and you have a work of the heart!

Flower Garden Digital Image

Designed by Austin Owens. Copyright Austie Bost Stamps. Licensed by CDS.


 The DT members who created previews with this digi:

 ...................................

In color too!!!!!
  

Flower Garden Color Digital Image

Designed by Austin Owens. Copyright Austie Bost Stamps. Licensed by CDS.


The DT members who created previews with this digi:

Thank you so much for spending a little time with us today!  I hope that our digis and samples have inpired you to some level of creativity today!  Please leave a comment for our illustrators and Design Team to let them know what you think of their creations!

Hope your day is filled with blessings and crafting galore!

Tuesday, November 27, 2012

BABY JESUS NUGGET AND MANGER TUTORIAL

Welcome to today's TUESDAY TUTORIAL.  Lisa here with you today.  Its been awhile. Hope you all that celebrated Thanksgiving had a blessed time with family making memories. Personally I cooked my first Turkey in 24 years and destroyed it. Hee. I am now determined to learn how to cook a good turkey.
Getting back to today's Tutorial, I am going to walk you through, step by step, making the adorable manger and nuggets using the new digi Lori McCroskey designed

Here is Lori's example.  She printed out the brown colored manger pieces onto white cardstock and assembled.  In my tutorial I will be showing you another way to make it...printing onto colored cardstock (Kraft) and printed out the pieces that are uncolored for the manger.

Here you can see I filled up my 8 1/2 x 11 piece of Kraft cardstock with enough pieces to make 5 mangers. I put them side by side.  I will cut them apart where they touch using my paper trimmer to get a straight cut. I used the png images and arranged them in Microsoft Publisher. You just need to make sure you leave at least 1/4" from the edges because the computer will cut that much off when it prints.

Now score along the four outter tabs and in the center from the side edges.

Now fold along the score lines. I folded so the score lines of the manger will be on the bottom of this piece and the little tabs are folded so the tape will go against the printed lines....they'll get hidden when assembled.

This is optional.....I embossed the manger pieces using my Cuttlebug and Cuttlebug Embossing Folder Distressed Stripes.

After I embossed the pieces I sponged all the edges (front and back)....again this is optional. I am just giving you options. I want this to be special.

I printed out a colored manger side to use as a guide for assembling my side pieces.

I placed two strips of Score Tape to adhere the top piece.

I adhered the sides and punched holes in the one on the left to show you that I inserted gold mini brads.

Here's the backs of them to show you how I bent my brads inward so they won't show outside of the manger.

I cut my score tape in half length wise to fit my tabs.

You will find the edges of the manger match up with the side edges just right.

Here is our manger. Ready to add a filler (if you like).

I printed out my colored baby Jesus nugget wrappers onto a light weight white cardstock. You can even use copy paper.  Again I arranged them in Microsoft Publisher using the png images. I made them touch each other so I can cut them apart at one swipe with my paper trimmer on each row.

I sponged the edges of the nugget wrapper to match the sponged edges of the manger.  I also cut out another baby Jesus and sponged him.

Just place  a piece of score tape at each end on the back of the nugget wrapper.

Wrap the wrapper around your Hershey Nugget and adhere. I placed a small piece of dimensional tape on the back of my cut out Baby Jesus.

I placed some filler in my manger and topped with my Baby Jesus Nugget. This is the cutest project made so easy with Lori's digital image.  I hope you found this tutorial helpful and have fun making your own gifts for friends, family, teachers, party favors etc.

Enjoy each and every day of this blessed holiday season. 

QUESTIONS FROM COMMENTS:
One more question ... Is there a way to print out the Jesus nugget wrappers on the Avery mailing labels usually used for these types of projects instead of printing on cardstock and manually cutting out?

YesIn Word, you simply go to the Mailing tab, labels, choose label Avery 8160, create page, Insert/Picture, choose the nugget label and then fill your page by repeating the insert function or copy and paste!  So simple!