I love hearing from you!

If you ask a question in your comment, please make sure to either show your email in your blogger profile, or email me directly....this is the only way that I can answer you!

Tuesday, October 16, 2012

October Digi Day at CDS!


Hello Everyone!
Oh, it is a good day today....new digis!
We have some new digis to share with you and I think you are going to be thrilled with all the options that you have this month!  So, let's get going!


Let's get started, but first............................................................
Are you new to digis?  Well if you are, here is a quick explanation.  You will buy and download a "zipped up" file.  You will unzip this file and receive all the images in jpg and png formats.  You will then pull those into a Word doc or picture editor and print, print, print.


................................................................

Digis by Laurie Wilson


Laurie has been busy coloring up some adorable images for you this month!  You will recognize most of them from our stamp line, but now they are colored, sizeable, and oh so much more fun!

These make a perfect table conversation piece for Thanksgiving!


Eat More Ham Digital Image

Designed by Laurie Wilson. Copyright Clear Dollar Stamps

Go to Eat More Ham Digital Image


The DT members who created previews with this digi:
...................................
How cute is this set for some fall decorations, fall journaling books, or some perfectly adorable scrapbook pages!


Patchpal Scarecrow Digital Image
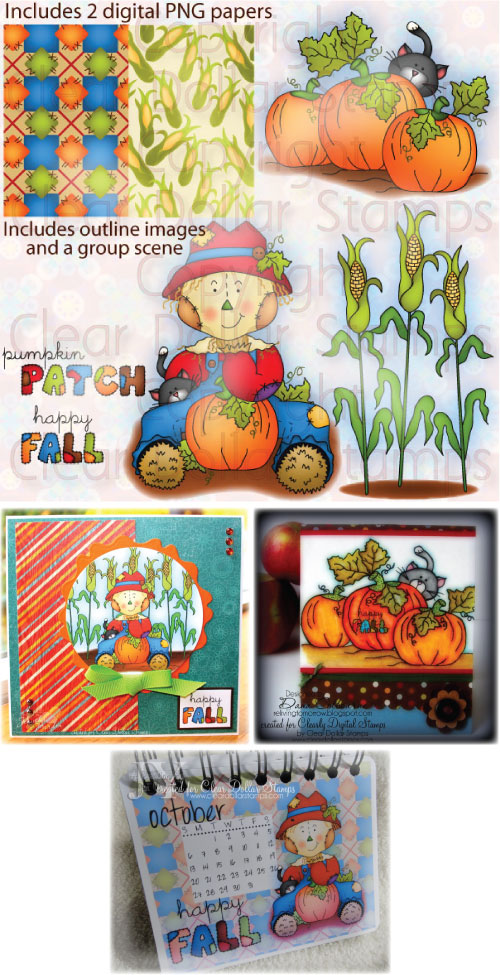
Colorization, arrangement and papers by Laurie Wilson. Image by past CDS illustrator. Copyright CDS.


Go to Patchpal Scarecrow Digital Image


The DT members who created previews with this digi:
Jerusha Borden
Dana Colbourne
Jen Young
  ...................................

Maybe Rodolph would like to get a card from your kids this Christmas....what a perfect set for them to surprise Santa and his Reindeer.

Patchpal Reindeer Digital Image

Colorization, arrangement and papers by Laurie Wilson. Copyright Clear Dollar Stamps.

Go to Patchpal Reindeer Digital Image


The DT members who created previews with this digi:
 ...................................

Here is a very festive set for those who like traditional Christmas images!

Holiday Nutcrackers Digital Image

Designed by Laurie Wilson. Copyright Clear Dollar Stamps.

Go to Holiday Nutcrackers Digital Image


The DT members who created previews with this digi:
 ...................................

I think I will be making some gorgeous Christmas cards to give as gifts or sell at craft fairs with this set!

Antique Ornaments Digital Image

Designed by Laurie Wilson.  Copyright Clear Dollar Stamps.

Go to Antique Ornaments Digital Image


The DT members who created previews with this digi:
 ...................................

I love this set....perfect for all of my ministry Christmas Cards!


Little Bethlehem Digital Image

Designed by Laurie Wilson.  Copyright Clear Dollar Stamps.

Go to Little Bethlehem Digital Image


The DT member who created previews with this digi:
 ...................................

Digis by Lisa Lara


So simple and so cute!  A must have for your digi collections!


Flakes Digital Image


Designed by Lisa Lara. Copyright Lisa's Doodley Doos. Licensed by Clear Dollar Stamps.

Go to Flakes Digital Image


The DT members who created previews with this digi:
 ...................................

Why not make some recipe cards with this set to give as gifts....and include some handmade gift bags and tags with some kitchen goodies in them!


Souper Digital Image

Designed by Lisa Lara. Copyright Lisa's Doodley Doos. Licensed by Clear Dollar Stamps.

Go to Souper Digital Image


The DT members who created previews with this digi:
 ...................................

Digis by Austin Owens


Austin has been busy doodling up a storm this month! 
Can you believe the size of these sets????
Colored too!

Autumn Digital Image

Designed by Austin Owens. Copyright Austie Bost Stamps. Licensed by CDS.

Go to Autumn Digital Image


The DT member who created previews with this digi:
 ...................................

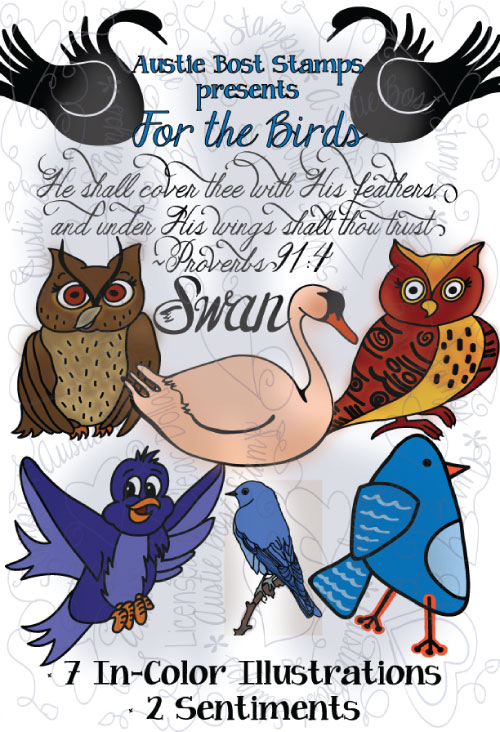
For the Birds Digital Image


Designed by Austin Owens. Copyright Austie Bost Stamps. Licensed by Clear Dollar Stamps.

For the Birds Color Digital Image

Designed by Austin Owens. Copyright Austie Bost Stamps.  Licensed by Clear Dollar Stamps.


The DT member who created previews with these digis:
 ...................................

Tulips Digital Image
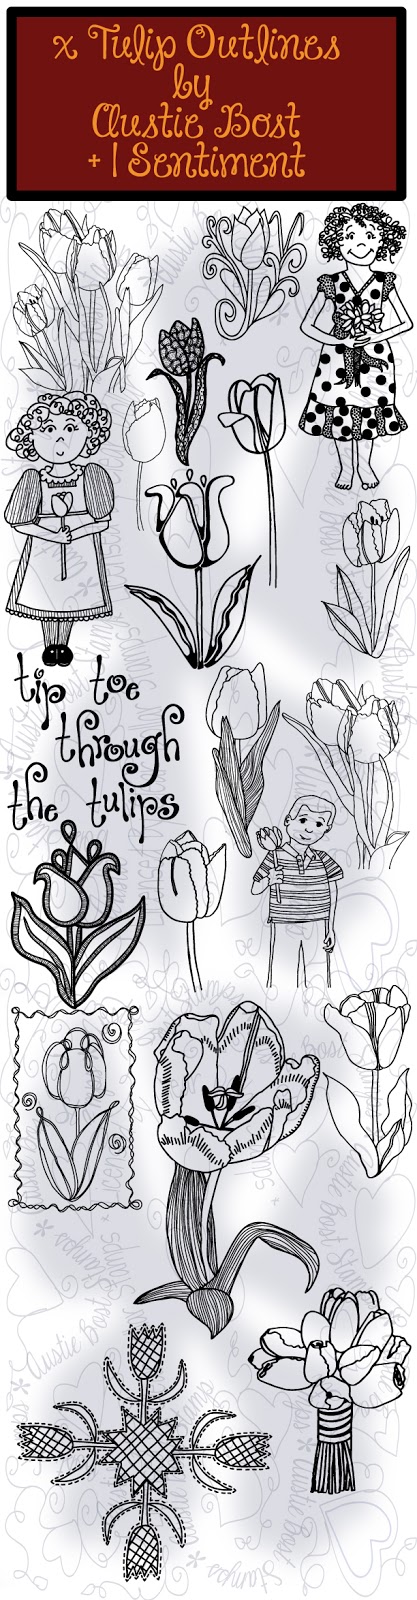
Designed by Austin Owens. Copyright Austie Bost Stamps. Licensed by CDS.


The DT member who created previews with this digi:
 ...................................


Tulips Color Digital Image


Designed by Austin Owens. Copyright Austie Bost Stamps. Licensed by CDS.


 Go to Tulips Color Digital Image


The DT member who created previews with this digi:
  Jen Young
 ...................................

Aren't these wonderful to make lots of cards and scrapbook pages?

Flowers and Leaves Outlines Digital Image


Copyright Austie Bost Stamps.  Licensed by Clear Dollar Stamps.

Flowers and Leaves Digital Image

Copyright Austie Bost Stamps. Licensed by Clear Dollar Stamps.


 Go to Flower and Leaves Outlines Digital Image

 Go to Flowers and Leaves Color Digital Image


The DT member who created previews with these digis:
 ...................................

Digis by Lori McCroskey


This month I started thinking about Christmas presents!  One of my favorite gifts to make are Birthday Calendars....so I've created several variations for you to choose from!  For those of you that don't know what a Birthday Calendar is, let me explain :-)  This calendar you can use year after year.  You write the birthday person's name on the line that corresponds with their birthday and you have an ongoing log of all your birthdays that never expires!

 Birthday Calendar Square Digital Image
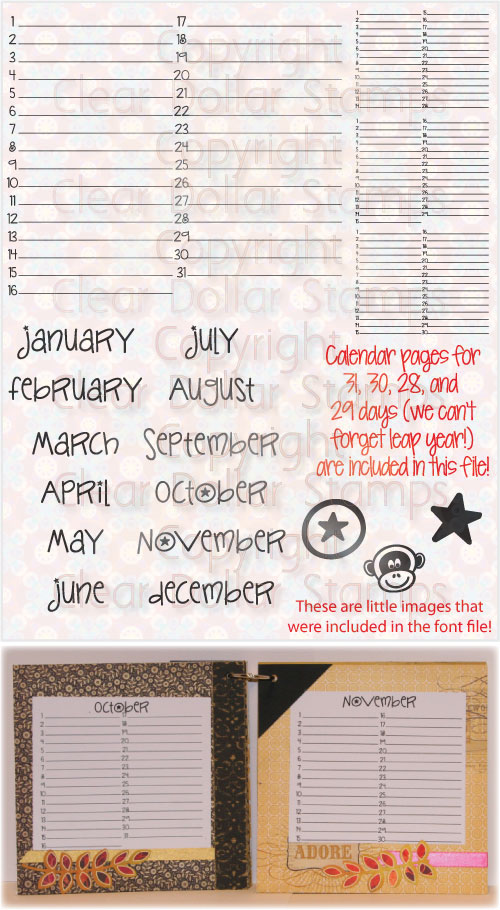
Designed by Lori McCroskey. Copyright Clear Dollar Stamps.

Go to Birthday Calendar Square Digital Image


The DT members who created previews with this digi:
 ...................................

This little calendar I thought would be perfect for scrap pages too!
Sarah did an adorable card with this set....take a look!

Birthday Calendar Round Digital Image
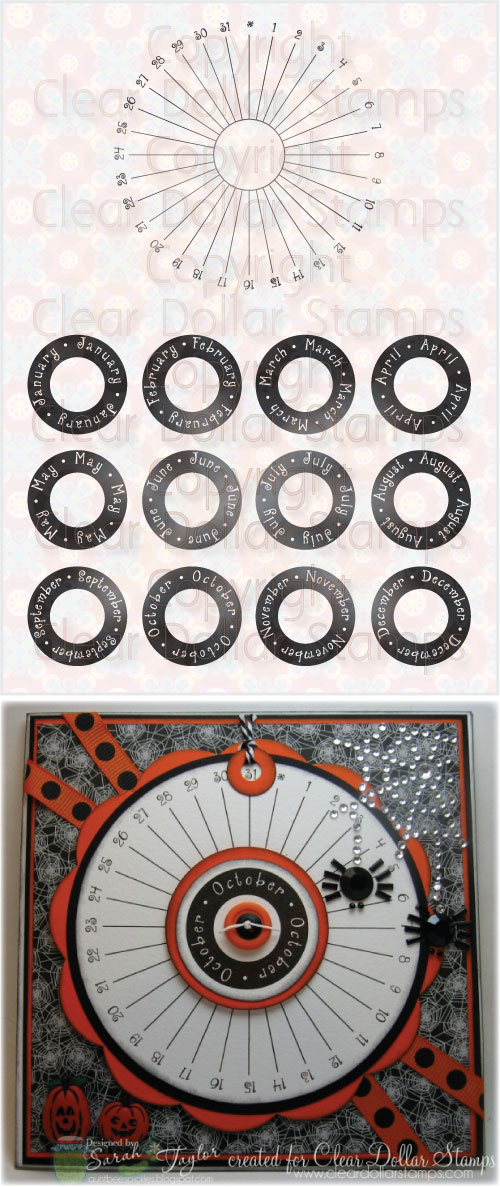
Designed by Lori McCroskey.  Copyright Clear Dollar Stamps.

Go to Birthday Calendar Round Digital Image

The DT member who created previews with this digi:
 ...................................

This set is good for years to come!  Create little calendars with this set!  All you have to do is figure out what day of the week your month starts on and you are ready to go!  All the months with 28, 30, and 31 days are included!

Mini Calendar Handwritten Digital Image
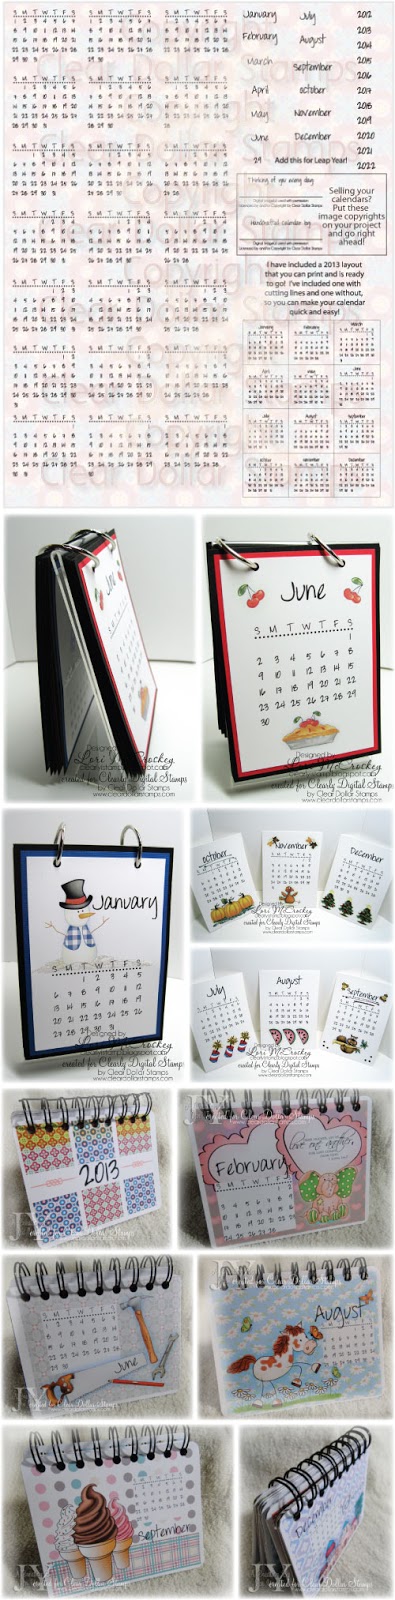
Designed by Lori McCroskey.  Copyright Clear Dollar Stamps.

Go to Mini Calender Handwritten Digital Image


The DT members who created previews with this digi:
Jen Young
Lori McCroskey
 ...................................
This set is perfect to go with any of the calendar sets and with the Calendar Mini set!  You can color it yourself, or by the colored version...which is what I used!  An image for every month of the year, you can create an adorable calendar in a snap with these sets!

Calendar Minis Digital Image
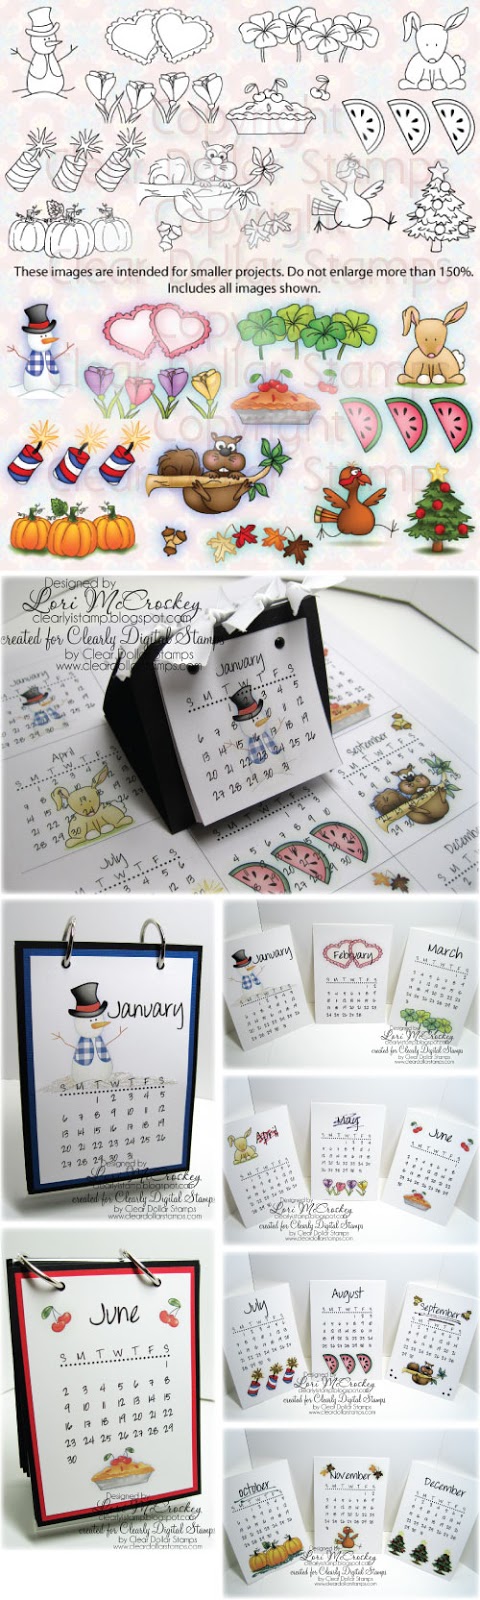
Designed by Laurie Wilson.  Copyright Clear Dollar Stamps.

Go to Calendar Minis Digital Image


The DT member who created previews with this digi:
Lori McCroskey 
 ...................................

This set is to create Rainbow Creations!  I have included a round version, rectangle version, and some papers for you to create some nice projects!  Jen created some adorable bookmarks with this set....I'm working on a few more to show you....as soon as I have them done, I'll post them on the blog!

Rainbow Notes Digital Image
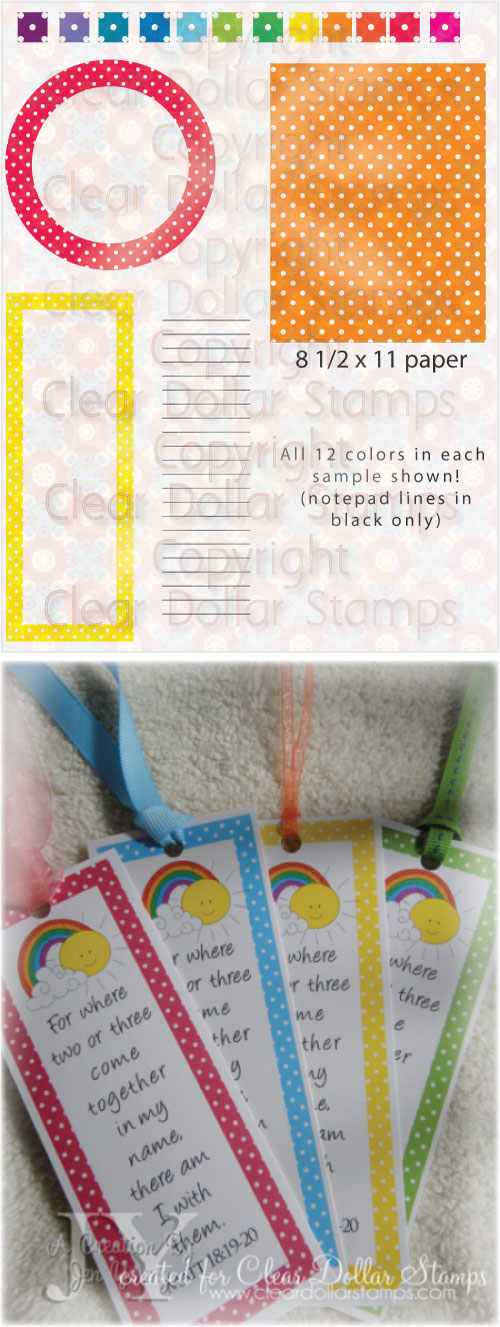
Designed by Lori McCroskey.  Copyright Clear Dollar Stamps.

Go to Rainbow Notes Digital Image


The DT member who created previews with this digi:
Jen Young
 ...................................

This set is perfect to make little witnessing hangers for your kids to leave for other kids!
I'll show you how in an upcoming tutorial for Witnessing Wednesday!

Romans' Road Rainbow Digital Image
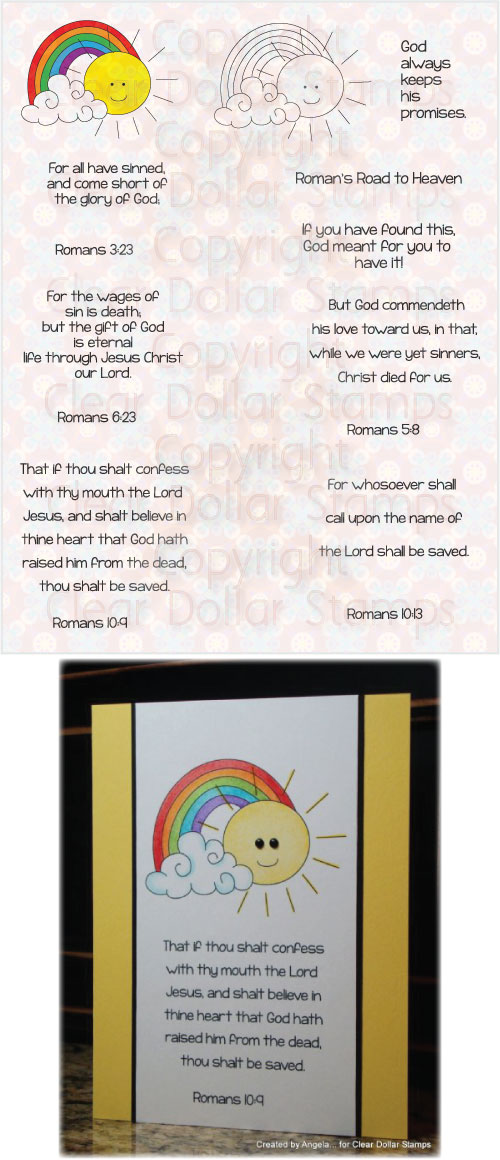
Designed by Lori McCroskey.  Copyright Clear Dollar Stamps.

Go to Romans' Road Rainbow Digital Image


The DT members who created previews with this digi:
 ...................................

If you just want the image to create with, we offer that too!

Happy Rainbow Digital Image

Image by past CDS illustrator.  Copyright Clear Dollar Stamps.

Go to Happy Rainbow Digital Image


The DT members who created previews with this digi:
 ...................................

What perfect little gifts to give at church or as witnessing tools!

Sweet Jesus Digital Image

Designed by Lori McCroskey.  Copyright Clear Dollar Stamps.

Go to Sweet Jesus Digital Image


The DT member who created previews with this digi:
 ...................................

This set is perfect to encourage a friend or family member with a card!

Scriptures of Peace Digital Image
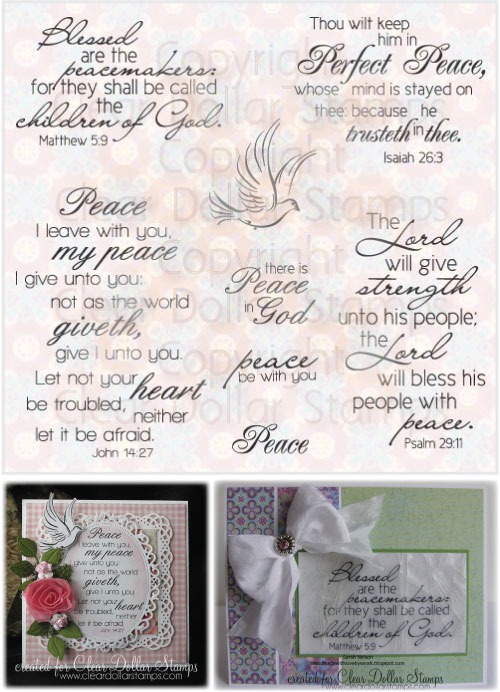
Designed by Lori McCroskey.  Copyright Clear Dollar Stamps.
Go to Scriptures of Peace Digital Image


The DT members who created previews with this digi:
 ...................................

Another great ministry set to encourage your fellow church workers!

Church Chatter Digital Image

Designed by Lori McCroskey.  Copyright Clear Dollar Stamps.

Go to Church Chatter Digital Image


The DT member who created previews with this digi:
 ...................................

I think some of these would make nice little desk plaques, don't you?

Whatever Digital Image

Designed by Lori McCroskey.  Copyright Clear Dollar Stamps.

Go to Whatever Digital Image


The DT member who created previews with this digi:


Thank you so much for attending our Digi release!  Please leave some comments for all of our wonderful design team!

Hope your day is filled with stamping and blessings galore!


Friday, October 5, 2012

Clearly Inspired Challenge #61 (CIC61)


Hello, crafty friends!  It's October, and time for another new Clearly Inspired Challenge!  Did you play along last month?  We had a total of 106 players over the course of the month. . .wow!  That gives us a total of 3 winners for the $10 gift codes, and 5 winners for the September Featured Digi!  There was so much participation that I am still trying to get around to see everyone's work.  We really do appreciate all of you that participate.  Here are the random winners:

$10 Gift Code

September Featured Digi

Congratulations, and please contact Cassie (cassandratrask@yahoo.com) by the end of the month to claim your prize.

Now onto the new challenge:

Sentimental

We want to see sentiments as the focus for your projects!  Before you submit, please check out our CHALLENGE GUIDELINES.  Our lovely Lisa Lara, has provided a new October Featured Digi.  Too cute, right?!


Now for some fun inspiration from our talented DT:

Lori McCrosky -- featured digi Word Doodles


Deonna Bemish -- featured digi Word Doodles


Kathy Dunnegan -- featured digi Word Doodles


Barb Gmitro-Best -- featured digi Word Doodles


Cassie Trask -- featured digi Word Doodles

Please link directly to your project using Mister Linky down below.  We also ask that you link back here to Clearly Inspired Challenge sponsored by Clear Dollar Stamps.  You have until Thursday, October 18th at midnight to enter this challenge to be eligible for the prizes at the end of the month.  Be as creative as you can while sticking to the theme.  Remember, only one entry per person, please :)
We can't wait to see what you come up with!


Tuesday, October 2, 2012

Table Decorations with Digital Stamps


Hello, it's Kathy D. here! It seems like forever since I posted a Tuesday Tutorial. Not complaining as life continues to be busy but it sure is nice to share with you again.

I love Halloween....which I know is weird since I'm a Christian but what's better than dressing up, acting like a kid and eating candy! I don't do the scary side to Halloween but the fun, festive....make you smile Halloween. Sometimes it is hard to find those decorations in the store and if you do they cost a TON! I'm a cheap decorator so I found a way to decorate my dining table without breaking the bank. How?.....With digital stamps and an SVG/PDF file!!

To make this festive table decoration I used the following:
Spider Greetings Color Digital Image
Autumn Friends Color Digital Image
Choo Choo Train - Cuttin' Up SVG & PDF File
1/8 Scor-tape
1/4 Scor-tape
spider webbing
small pumpkins
candy
Cuttin Up Cricut Cartridge
Elegant Edges Cricut Cartridge
Cricut
Xyron and Xyron X
brads
Bazzill Cardstock

Now I will show you close ups and talk about it a little. It is all very easy to do!

I printed out a regular image of the spider and then a mirror image of it so I could glue them back to back. After I cut them out I put them in my xyron to turn them into a sticker. Put fishing line between the two spiders and there you have cute hanging spiders!

I printed off the bag/tag file that comes with the digital stamp. I cut out the purple paper on the Cricut using the Elegant Edges cartridge. Layered all that onto orange and there you have a cute Halloween place mat. I will probably take them to the office store to get them laminated.


I used the Choo Choo Train SVG/PDF file to make this cute Pumpkin Express train for the center piece. The file comes with instructions and is easy to do. I placed clear transparency over the windows so the candy wouldn't fall out. I decorated the train with cut cardstock to give it a festive look. A word of advice....the wheels won't hold up to the weight of the candy. So I took some foam board and placed that behind the wheel. It helped but depending on how heavy the candy is depends on how well it stays up. So you can leave the wheels off if you are going to have something heavy in the train.

And there you have the finished look. I hope this inspires you to try making your own decorations with digital stamps!

Have a blessed day!


Wednesday, September 26, 2012

A little fall treat for my Sunday School kids!


Welcome to Witnessing Wednesday!

Witnessing Wednesday is going to be filled with witnessing ideas for kids and adults, ideas for ministry, and church projects that I have done for my Sunday School kids!

This week I am going to show you the little fall treat boxes that I have done for them :-)


I used Lisa's Punkin Set....it is just adorable and came with matching paper....it was just too much for me to resist!


First, I printed out a bunch of little punkins to trim out while sitting at gymnastics, waiting in the car, and eating lunch at my mother-in-law's house on Sundays (yes, my MIL has us over for dinner every other week and I get spoiled with fried chicken, mash potatoes and gravy, and PIE :-) Yummy!)

Here is a closeup of my trimmed up punkin!  It really went pretty quick and easy!

 Next, I started with a little box that I found at the dollar store....but making your own would be easy enough!  They just popped up and I glued my digi paper to them :-)  I printed a complete 8.5x11 sheet of paper and then trimmed it to size.  If you were to print it on cardstock, you could make a quick little box out of it in a flash....especially if you have some sort of cutting machine!
Next, I added a little pop up tape (poppin dots, what ever you have to make it dimensional) to attach my punkin to the front of my box.
 
I found the orange cellophane at  Hobby Lobby!  I wrapped some candy corn in to the cellophane and tied it with a black and white piece of bakers twine.  I added some more candy in the box and now I am ready for our fall party at church!  I'm so excited to have them done this early!  I have 12 little boxes already sitting and ready to go!
 
 
 These would also be a sweet little treat to make up for the elderly that are shut in or in nursing homes in your church!  I better make a few more!


I hope you will enjoy making these little treat boxes!  Check back on Wednesdays for more ministry ideas!

Hope your day is filled with crafting and blessings galore!

Friday, September 21, 2012

Clearly Inspired Challenge #60 (CIC60)


Hello there, crafty friends!  Oh Friday, sweet Friday. . .I'm sure we are all so happy to see you!  It's also the third Friday of the month, making it Clearly Inspired Challenge time.  There were a bunch of wonderful entries to challenge #59, so I am still working my way around to all of them.  Thank you to all that have been playing!  Shall we get to the newest challenge?

Fall into Fall

We want to see some Fall themed projects!  C'mon, we know you're itching to get some more Fall cards done, so when you do come back here and enter them.  We only ask that you check out our Challenge Guidelines before you submit.  Here is the darling September Featured Digital image that our extremely talented Lisa Lara created:


Now here's some inspiration from our DT:

Lisa Lara -- featured digital image Piles of Fun


Jen Young -- Charlie Harvest digital image


Deonna Bemish -- featured digital image Piles of Fun


Vickie O'Dell -- Leaves Color digital image


Kathy Dunnegan -- Leaves Color digital image


Cassie Trask -- featured digital image Piles of Fun

Please link directly to your project using Mister Linky down below.  We also ask that you link back here to Clearly Inspired Challenge sponsored by Clear Dollar Stamps.  You have until Thursday, October 4th at midnight to enter this challenge to be eligible for the prizes at the end of the month.  Be as creative as you can while sticking to the theme.  Remember, only one entry per person, please :)
We can't wait to see what you come up with!


Thursday, September 20, 2012

We Have a Winner for the Sunday Blog Hop!


We have a winner from our September Blog Hop!

Congratulations Loll Thompson from Stamping With Loll, you are our winner!!! Your name was chosen from Cassie's blog, A Day in the Life of a Homeschooling Mom. Please contact Cassie at cassandratrask@yahoo.com to claim your prize!!!


Tuesday, September 18, 2012

Tuesday Tutorial: Using Digital Papers


Welcome, friends! It's time for another Tuesday Tutorial. Today's topic is Digital Papers. After our last tutorial, where Lori shared her gorgeous craft fair gift card set, we received quite a few questions on this topic. Digital papers are included in many of our digi sets, and we want to make sure you are fully comfortable using them. So let's get started! :-)

Please note that this tutorial does assume some basic understanding of digis. If you are brand new to using digis, please visit our Digi Stamps 101 page  for directions to get you started. Also, for this tutorial, I'll be using Microsoft Word 2010. If you'd like to follow along with my directions for resizing and printing digital papers using Word 2010, but don't currently have this program installed on your computer, you can download a free 60-day-use trial of Microsoft Office 2010 HERE (Microsoft Word is included in the Office suite of programs).

A. What are Digital Papers?
"Digital papers" are just another type of digi. At Clear Dollar Stamps, our digital papers are full-color, patterned images. They are like any other pre-colored digi that we offer, only larger. We include digital papers with many of our colored digi sets, and also have several "just paper" packs available for purchase. Digital papers come pre-sized, but are resizable to meet your crafting needs.

Digital papers can be used in your digital creations (i.e. digital scrapbooking). Alternately -- and this is how most of our designers use them -- they can be printed and used in your craft projects in place of traditional patterned papers. Think of a pad of scrapbooking paper you might buy at a craft store. Each of our digital papers is like one sheet in that pad. The advantage of digital papers, however, is that if you like a particular pattern, you can print it as many times as you want, without having to buy a whole new pad!

B. Do I Need Special Software to Use Digital Papers?
As with our other digis, some basic software is required to use digital papers. You will need to use a zip utility to download and unzip the files after you purchase them. You will also need to have a program on your computer that will allow you to resize and print images.  If you have been using our digis successfully, then you already have what is needed on your computer to use digital papers. However, if you are new to using digis, or need links to some basic software you can use, please read our Digis 101 page to learn more.

C. What Kind of Printer is Required to Print Digital Papers?
To print digital papers, you need to have a color printer. Remember, our digital papers are full-color, so they will not look right if printed in black-and-white! The higher the quality of your printer, the better the digital papers will look when printed.

D. What Kind of Paper is Needed to Print Digital Papers?
No special type of paper is required to print digital papers. However, smooth-surfaced, low absorbency cardstock/paper, such as Neenah cardstock, will likely give you the best results. (Papers and cardstocks that are highly absorbent may suck up the colored ink, and not give you the printing results that you like.) Also, keep in mind that digital papers are fully-colored, so if you print them on colored paper instead of plain white, you may get unwanted results.

I highly recommend that you test the paper you choose with your printer in advance to make sure it will feed through properly. Printers can be a bit prickly at times! :-)

E. How Do I Resize and Print Digital Papers?
The process for resizing and printing digital papers is exactly the same as for any of our other digis. You need to use a program that allows you to resize and print images to do this. There are many different computer programs that you can use, but as I've said many times before, I find Microsoft Word to be the easiest to use for these basic functions.

Here are directions for resizing and printing digital papers using Word 2010. If this feels like a review of the Digis 101 tutorial, that's because, again, the process is exactly the same! :-)

Placing the Digital Paper in a Word Document
  1. Open a new, blank document in Word.
  2. With your mouse, click on Insert on the menu bar at the top of the Word window, and select Photo from the pull-down menu.


  3. A second menu will appear to the side. From this menu, select Picture from File.
  4. The "Choose a Picture" window will appear on-screen. In this window, navigate to the digital paper you wish to open, and then click on the Insert button at the bottom right corner of the window.


  5. The digital paper you selected will be placed on your blank Word document, and will have a blue rectangle around it. This indicates that it is selected and able to be edited.

Making the Digital Paper Moveable within the Word Document

By default, because Word is a "word processing" program, the digital paper will be set to appear behind any text you might also type into this document. In order to be able to move the digital paper around on the document and place it where you want it, you will need to adjust this setting.
  1. If the digital paper is not already selected in the document window (blue rectangle appearing around it), click on it with your mouse to select it.
  2. With the digi selected, locate the Wrap Text button on the toolbar above the document window. Click on this button.


  3. A pull-down menu will appear on the screen. From this menu, select Tight.
  4. The digital paper can now be moved to wherever you wish to place it on the document. To move the image, left-click the image with your mouse and, while holding down the left mouse button, drag the image to where you want it in the document.
Resizing the Digital Paper
Once you have made your digital paper moveable within the document window, you may want to then resize it to fit your crafting needs. Something to keep in mind when resizing is that shrinking or enlarging it will proportionally shrink or enlarge the pattern of the paper. So if you want to use the pattern at its full size, you will need to print it at full size. Please note that resizing a digital paper in Word only affects how the image appears in and prints from the current Word document -- it will not change the actual file that is stored on your computer. To resize the digital paper in the Word document:
  1. If the digital paper is not already selected in the document window (blue rectangle appearing around it), click on it with your mouse to select it.
  2. With the digital paper selected, locate the "Size" setting boxes at the top right on the toolbar above the document window. You will see two text boxes, indicating the "Height" and "Width" of the image.

  3. IMPORTANT:  To the center right of the Height and Width boxes is a small checkbox -- the "Lock Aspect Ratio" box. Before making any changes to the Height or Width of the digital paper, be sure that a check-mark appears in this box. This will keep the image proportional as you resize it.
  4. To change the size of the digital paper, click inside either the Height or Width text box and, holding down the left mouse button, drag the mouse to highlight the current number.
  5. Type in the number you wish to change this measurement to, and then press the Return/Enter key on your keyboard. You need only change one number -- either Height or Width -- and the other will change proportionally. The image will instantly resize according to the new setting. 
Positioning the Digital Paper on the Page
Once you've sized the digital paper to your liking, you can move it to wherever you like on the page. To move the digital paper, simply click on it in the Word window and, while holding down the left mouse button, drag it around on the page. Be sure to keep the margin settings of the Word document in mind when choosing where to place the digital paper.

If you want to conserve cardstock, you could fill the rest of the page with digis or more digital papers before printing.


Printing the Digital Paper
Once you have your digital paper set up in the Word document to your liking, you are ready to print:
  1. Load the paper on to which you wish to print your digital paper into your printer's paper tray.
  2. In the Word window, click on File on the toolbar at the top left of the screen.


  3. A pull-down menu will appear on the screen. From this menu, select Print.
  4. Follow the prompts specific to your printer to complete the printing process.
F. Post-printing Tips
Be sure to let your digital papers dry before using them. Also, if you use a Laser printer, you may want to heat-set the ink before handling the paper. Finally, as with all paper products, we suggest keeping your printed digital papers away from liquids, as this may cause paper to disintegrate and the ink to run.

    G. A Free Digital Paper for You to Try
    If you'd like to give digital papers a try before deciding to purchase some, Clear Dollar Stamps has one that you may download for free from the store HERE. Because of how the store works, you will need to add the item to your shopping cart and check out as if making a paid purchase, but you will not be charged for this item.


    That's all there is to it! Digital papers are fun and easy to use, and we hope that this tutorial has you feeling more confident about using them. Of course, if you do have questions, please leave us a comment or contact Lori directly through the store. Be sure to include your email address so that we can respond. :-)

    Sunday, September 16, 2012

    Sunday Blog Hop -- ABC or 123


    Hello Friends!

    Welcome to our Monthly Sunday Blog Hop!

    These blog hops are the third Sunday of every month....a must see for a lazy Sunday afternoon!
    Each month we will have a theme which each Design Team member is challenged to interpret any way they like. 
    The theme for September is:
    ABC or 123
    We ask that you browse through each Design Team member's post and leave them an encouraging comment....short or long, they all are appreciated!
    There will be a prize each month!
    September's prize is:
    $25 gift certificate to Clear Dollar Stamps for Digital Images
    WINNER:  The winner will be randomly chosen from comments received on DT member blogs. The winner will be announced on the CDS blog Thursday, September 20th.
    ...........................................................
    Let's go look and see what my other DT members did!
    Remember, leave an encouraging comment and be entered to win our contest....the more comments, the more times you are entered!


    Have fun hopping, my friends, and be sure to leave comments along the way!  You could be the winner of the gift code!
    Thanks for hopping with us!  
    Hope your day is filled with blessings and stamping galore!